
API Authentication
This guide explains how to generate and use RSA-based HTTP Message Signatures to securely authenticate API requests to Layer1.
HTTP Message Signatures let you cryptographically prove both what you sent and when you sent it. Instead of relying solely on TLS (which protects the transport channel), message signatures protect the message itself end-to-end:
- Authenticity: The receiver knows the request came from a holder of your private key.
- Integrity: Any tampering with the method, URL, or body will break the signature.
- Replay Protection: Including a timestamp prevents attackers from resubmitting old requests.
By embedding the signature into standard HTTP headers, you keep your API calls fully HTTP-compliant while adding a robust cryptographic layer.
Generate RSA keys for HTTP signatures
To use HTTP signatures in your requests, you need an RSA key pair with:
- Private key. Use it to sign your requests. It must be stored securely in your system.
- Public key. Register it with Layer1 to authenticate your requests. The public key will be used to register your client or share it during setup.
To create an RSA key pair:
- Run the following command to generate a private key:
openssl genrsa -out api-client-key.pem - Extract the public key from the private key:
openssl rsa -in api-client-key.pem -pubout -out api-client-public-key.pem
Best practice:
- Store private keys in secure hardware or vault solutions where only your application can access it.
- Rotate keys periodically (for example, every 90 days) and automate rollover in your signer code.
Add your public key to the account
The above private key remains securely with your application, while the public key must be registered in Layer1 to authenticate your requests.
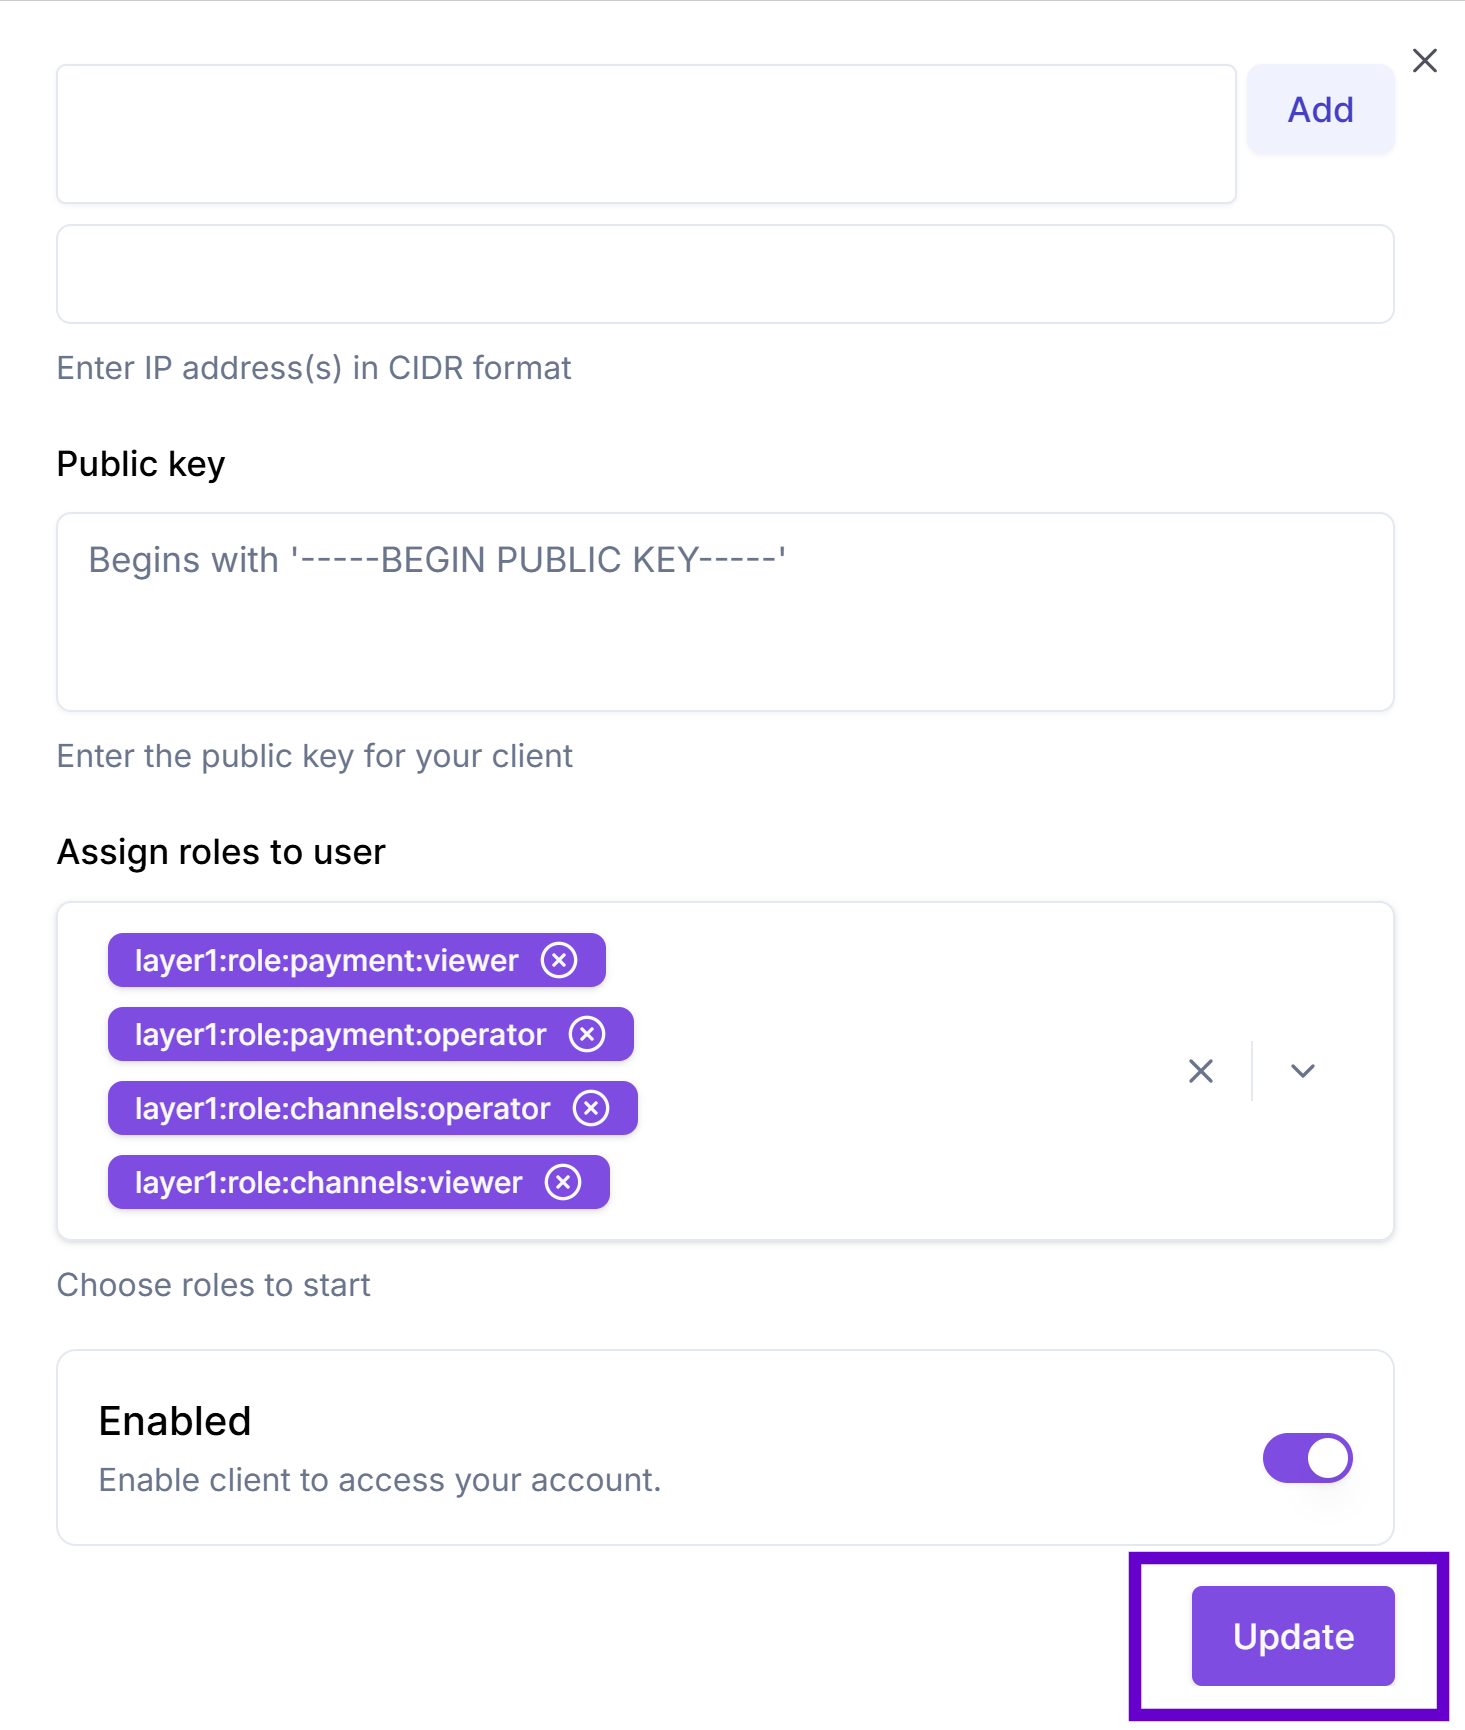
After extracting your public RSA key, add it to your account along with the IP addresses you require to be whitelisted:
-
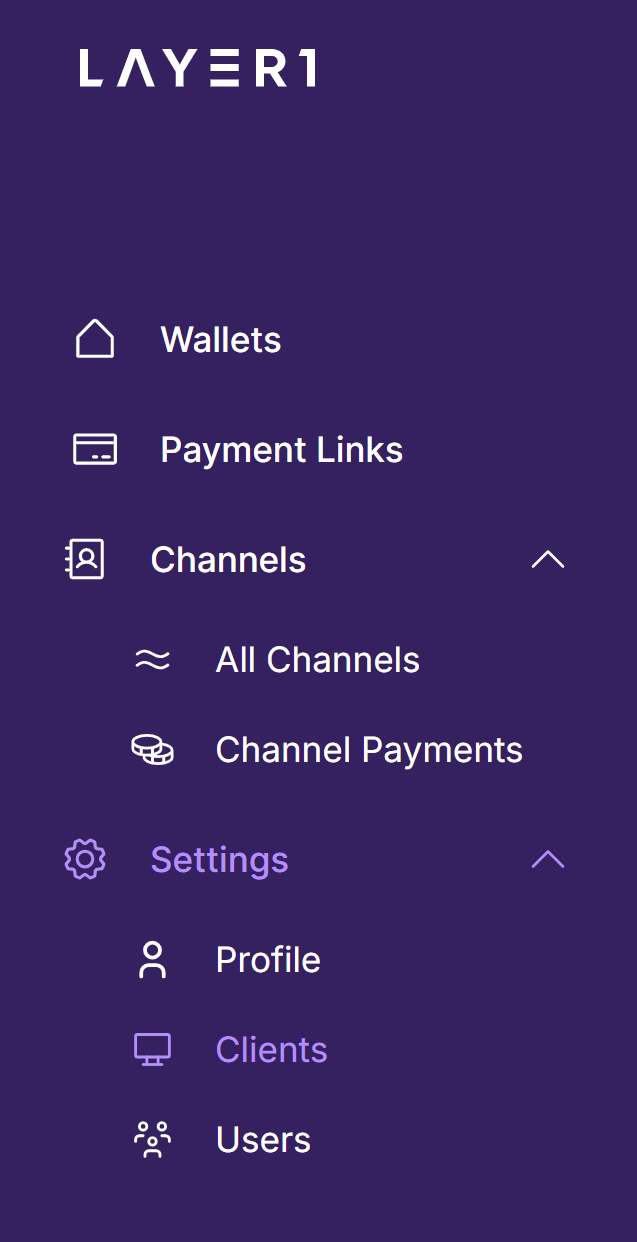
Log in to your account portal.
-
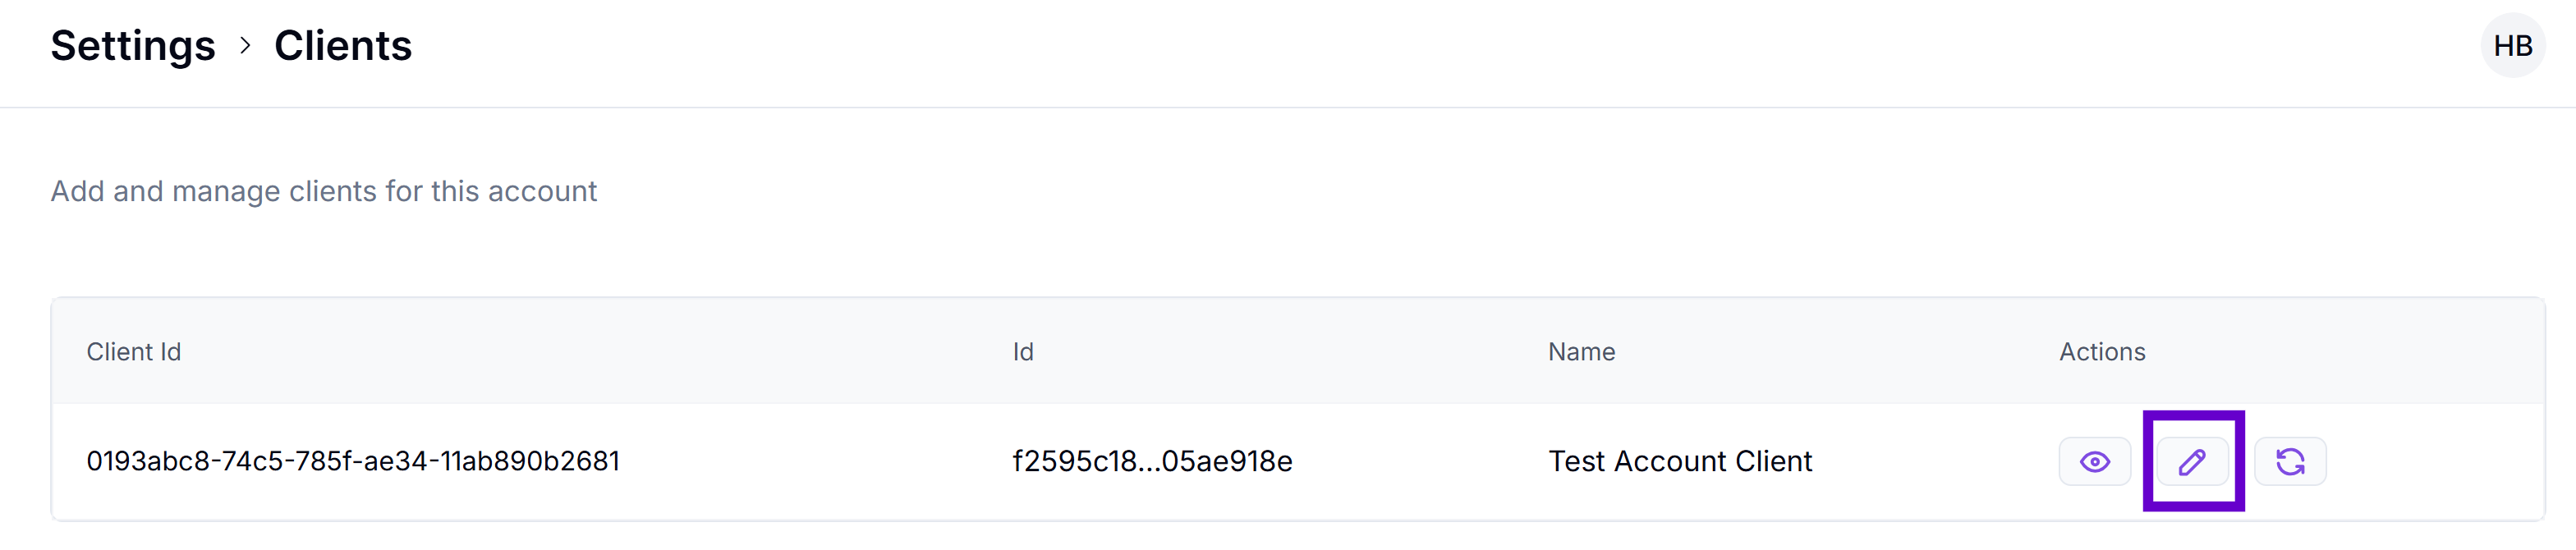
Go to Settings > Clients, locate the required client, and click Edit.
-
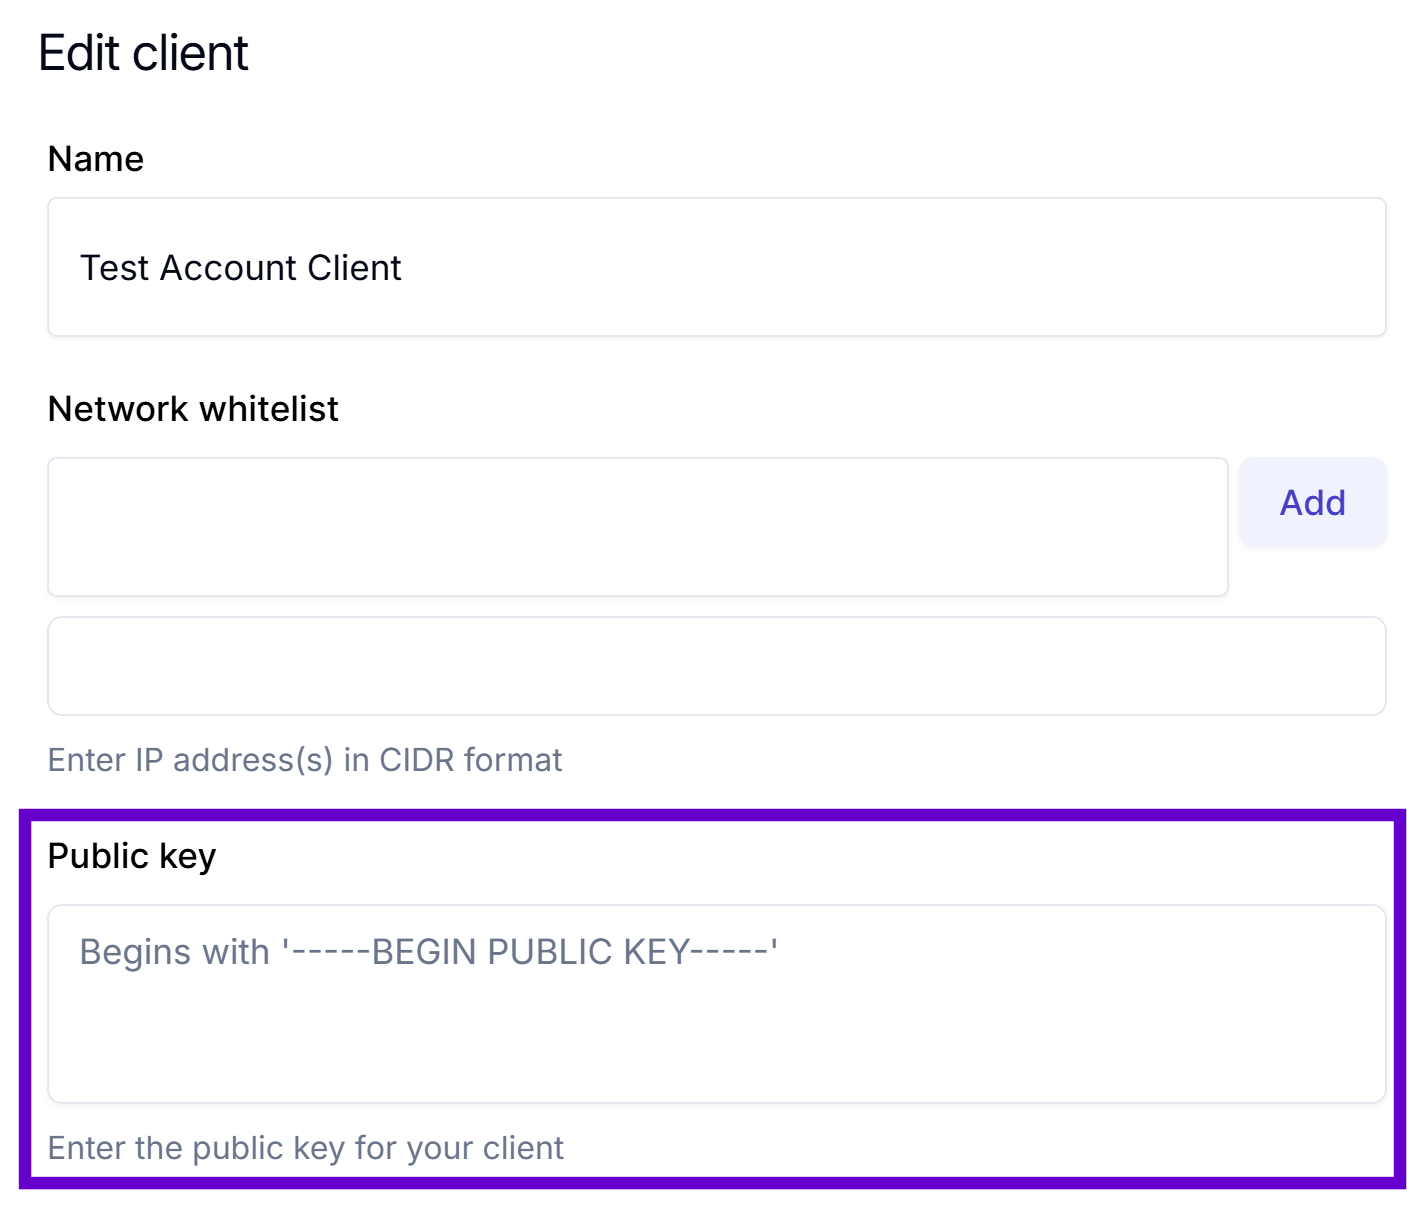
In the Public Key box, paste your generated public key.
-
In the Network whitelist box, enter the IP addresses for which the access must be provided and click Add.
To provide access to everyone, enter
0.0.0.0.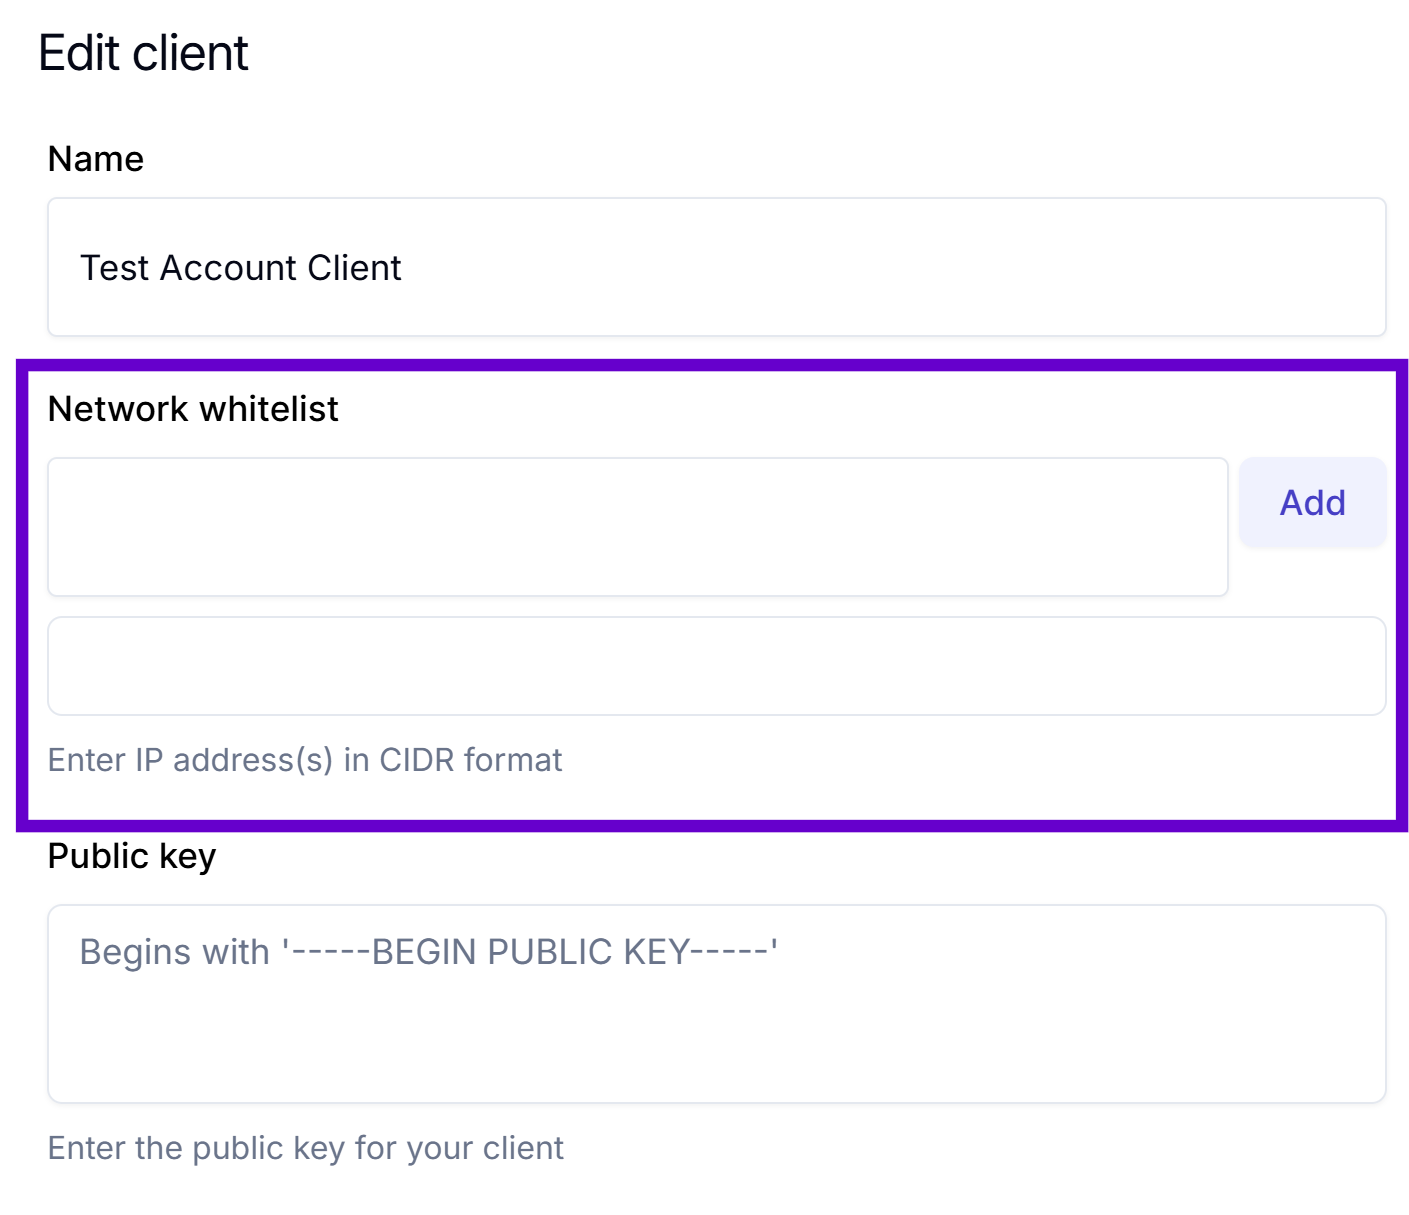
-
In the Assign roles to user, specify the required roles.
-
Click Update to save the changes.
Get your clientID
The clientId parameter within the signature headers is crucial for identifying the key used to sign the request. When you generate the signature headers, the clientId value is set to match the public key registered with Layer1.
To get your clientID, in your account portal, go to Settings > Clients and copy the required line.
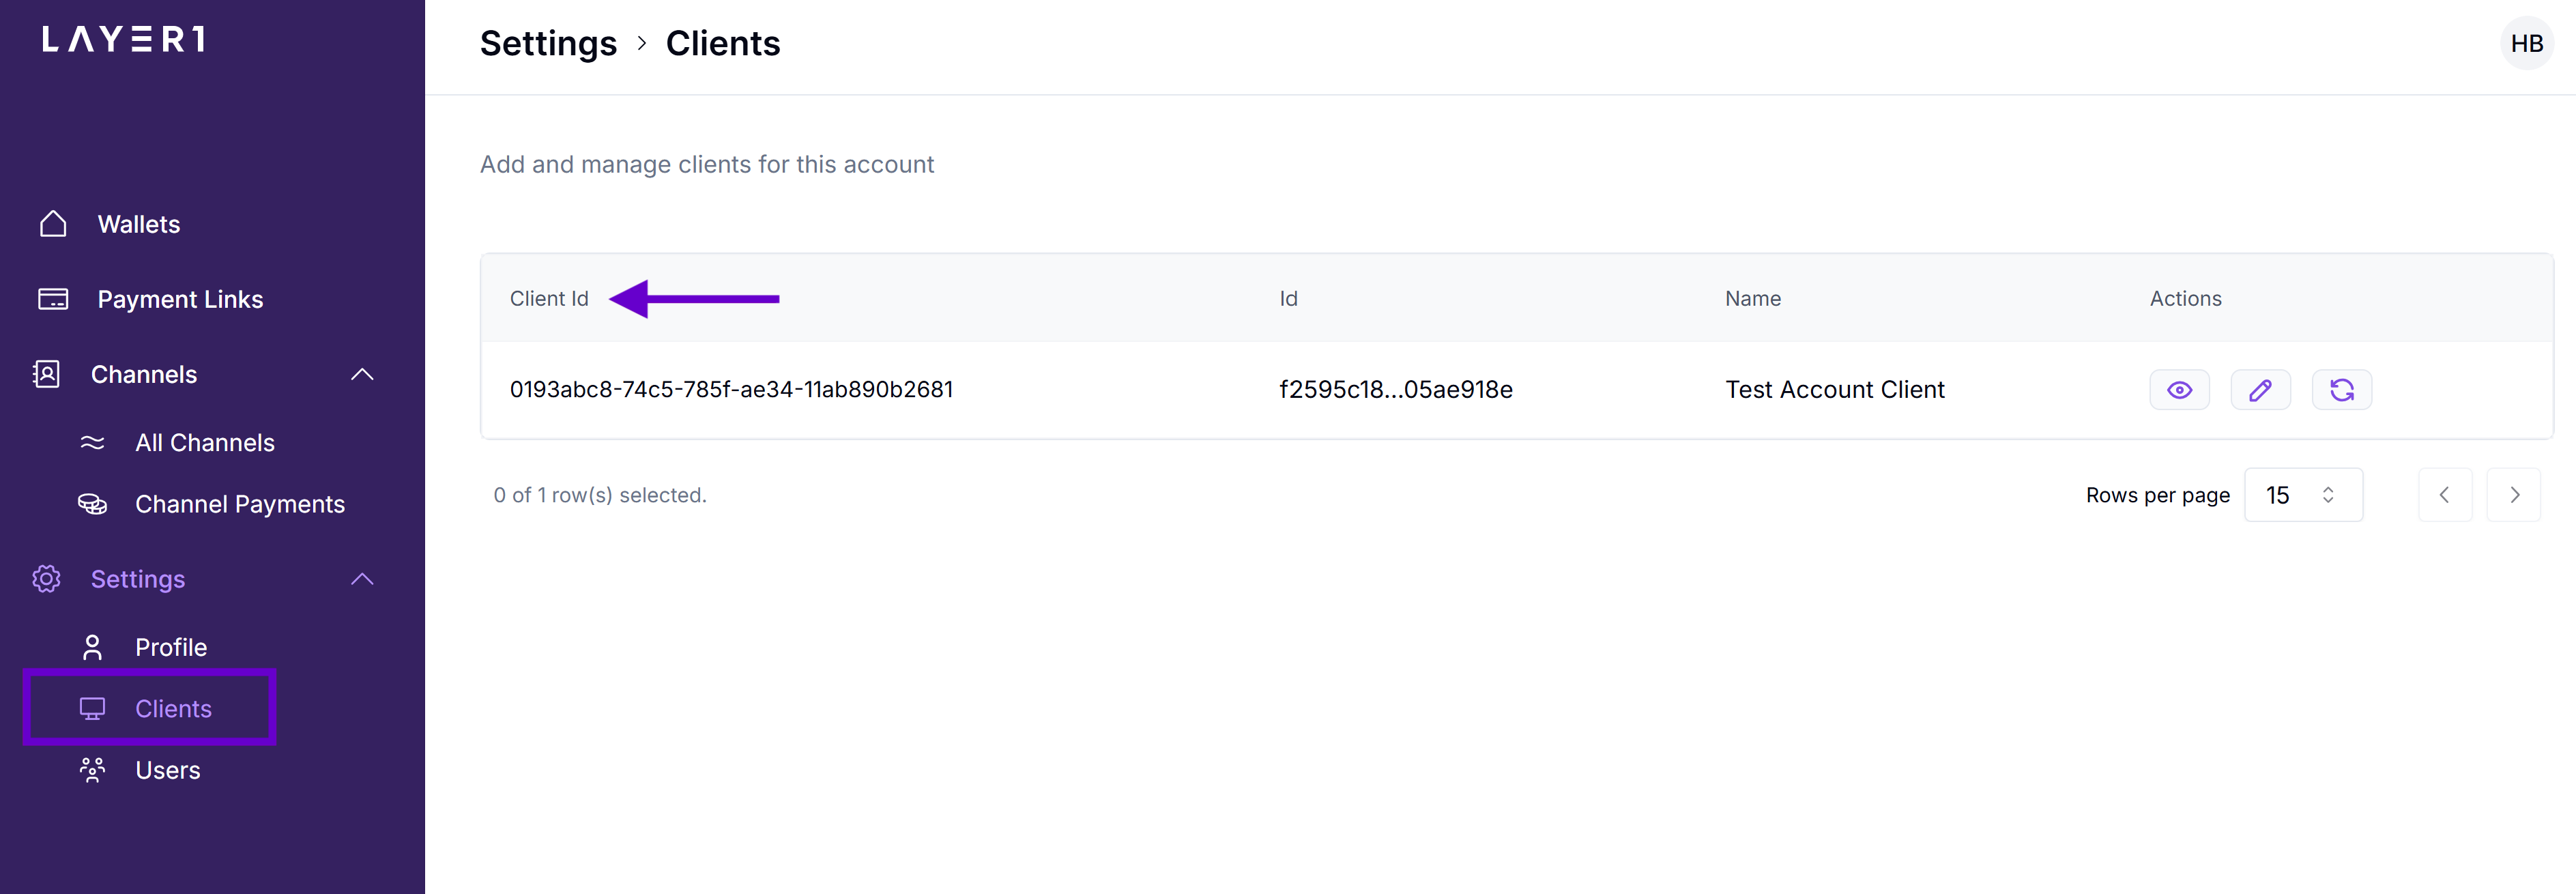
If you can't access the Clients section, request your
clientIDfrom an account manager and ask them to add your public key and allowed IP addresses for your account.
Sign HTTP requests
Layer1 requires request signing based on the HTTP Message Signatures standard (RFC 9421). Each signature is a combination of the following HTTP components:
- HTTP method (
@method) - Request URL (
@target-uri) - Request body (
content-digest). The SHA-256 digest of the request body ensures that the data has not been tampered with - Timestamp (
date). Date header is also included to mitigate replay attacks by ensuring the request is recent.
The signature is constructed by:
- Selecting HTTP components (
@method,@target-uri,content-digest,date). - Creating a base string.
- Signing the string using your private key.
POST /api/transaction HTTP/1.1
Host: api.layer1.com
Date: Tue, 27 May 2025 10:21:54 GMT
Content-Type: application/json
Content-Digest: sha-256=:W6ph5Mm5Pz8GgiULbPgzG37mj9g=:
Signature-Input: sig=("@method" "@target-uri" "content-digest" "date");created=1716792114;keyid="client-123";alg="rsa-v1_5-sha256"
Signature: sig=:MEUCIQDn...==
You can now construct a request body with headers using your clientId and sign it with the generated public key. The following code block is an example of the class to sign your requests.
import java.security.InvalidKeyException;
import java.security.KeyFactory;
import java.security.MessageDigest;
import java.security.NoSuchAlgorithmException;
import java.security.PrivateKey;
import java.security.Signature;
import java.security.SignatureException;
import java.security.spec.PKCS8EncodedKeySpec;
import java.time.Instant;
import java.util.Base64;
import java.util.HashMap;
import java.util.Map;
import java.util.Objects;

public class HttpSigner {

    private static final String SIGNATURE_ALGORITHM = "rsa-v1_5-sha256";
    private static final String DIGEST_ALGORITHM = "sha-256";
    private final PrivateKey privateKey;
    private final String clientId;

    /**
     * Constructor to load the private key from a Base64-encoded string.
     *
     * @param base64PrivateKey Base64-encoded private key string
     */
    public HttpSigner(String base64PrivateKey, String clientId) {
        this.clientId = clientId;
        this.privateKey = loadPrivateKey(base64PrivateKey);
    }

    /**
     * Load a PrivateKey object from a Base64-encoded string.
     */
    private PrivateKey loadPrivateKey(String key) {
        try {
            String preparedKey = prepareKey(key);
            KeyFactory keyFactory = KeyFactory.getInstance("RSA");
            return keyFactory.generatePrivate(
                new PKCS8EncodedKeySpec(Base64.getDecoder().decode(preparedKey))
            );
        } catch (Exception e) {
            throw new RuntimeException("Failed to load private key", e);
        }
    }

    /**
     * This method builds the necessary signature headers and returns them as a map.
     *
     * @param url     The full URL of the request
     * @param payload The body of the request (if any, POST, etc)
     * @param method  The HTTP method of the request
     * @return A map containing the signature headers
     */
    public Map<String, String> buildHeaders(String url, String payload, String method) {
        Map<String, String> headerParams = new HashMap<>();

        String contentDigest = null;
        if (!Objects.isNull(payload) && !payload.isEmpty()) {
            try {
                contentDigest = createDigest(DIGEST_ALGORITHM, payload);
                headerParams.put("Content-Digest", contentDigest);
            } catch (NoSuchAlgorithmException e) {
                throw new RuntimeException("Failed to create digest", e);
            }
        }

        String signatureParameters = createSignatureParameters(contentDigest);
        headerParams.put("Signature-Input", "sig=" + signatureParameters);

        try {
            headerParams.put("Signature",
                String.format("sig=:%s:",
                    sign(
                        String.format("\"@method\": %s%n\"@target-uri\": %s%n%s\"@signature-params\": %s",
                            method.toUpperCase(),
                            url,
                            contentDigest == null ? "" : "\"content-digest\": " + contentDigest + "\n",
                            signatureParameters
                        ),
                        privateKey
                    )
                )
            );
        } catch (Exception e) {
            throw new RuntimeException("Failed to sign request", e);
        }

        return headerParams;
    }

    /**
     * Remove the header and footer from the private key if generated via openssl, etc.
     *
     * @param rawKey The raw private key as a string
     * @return The prepared key without headers and footers
     */
    private String prepareKey(String rawKey) {
        String newKey = rawKey.replace("-----BEGIN PRIVATE KEY-----", "");
        newKey = newKey.replace("-----END PRIVATE KEY-----", "");
        return newKey.replaceAll("\\s+", "");
    }

    /**
     * Assemble the RFC 9421 signature parameters.
     *
     * @param contentDigest The digest of the content, if applicable
     * @return The signature parameters as a string
     */
    private String createSignatureParameters(String contentDigest) {
        return String.format("(\"@method\" \"@target-uri\"%s);created=%d;keyid=\"%s\";alg=\"%s\"",
            contentDigest == null ? "" : " \"content-digest\"",
            Instant.now().toEpochMilli() / 1000,
            clientId,
            SIGNATURE_ALGORITHM
        );
    }

    /**
     * Sign the request using SHA256withRSA.
     *
     * @param signatureBase The base string to sign
     * @param privateKey    The private key to use for signing
     * @return The Base64-encoded signature
     * @throws NoSuchAlgorithmException If the algorithm is not available
     * @throws InvalidKeyException      If the key is invalid
     * @throws SignatureException       If the signing process fails
     */
    private String sign(String signatureBase, PrivateKey privateKey)
            throws NoSuchAlgorithmException, InvalidKeyException, SignatureException {
        Signature signer = Signature.getInstance("SHA256withRSA");
        signer.initSign(privateKey);
        signer.update(signatureBase.getBytes());
        return Base64.getEncoder().encodeToString(signer.sign());
    }

    /**
     * Create and prepare the digest for the content-digest header.
     *
     * @param digestAlgorithm The algorithm to use for the digest
     * @param data            The data to digest
     * @return The formatted digest string
     * @throws NoSuchAlgorithmException If the algorithm is not available
     */
    private String createDigest(String digestAlgorithm, String data) throws NoSuchAlgorithmException {
        return String.format("%s=:%s:", digestAlgorithm, getDigest(digestAlgorithm, data));
    }

    /**
     * Generate the digest using the specified algorithm.
     *
     * @param algorithm The algorithm to use
     * @param data      The data to digest
     * @return The Base64-encoded digest
     * @throws NoSuchAlgorithmException If the algorithm is not available
     */
    private String getDigest(String algorithm, String data) throws NoSuchAlgorithmException {
        MessageDigest digest = MessageDigest.getInstance(algorithm);
        byte[] hash = digest.digest(data.getBytes());
        return Base64.getEncoder().encodeToString(hash);
    }
}
Use signed headers in API requests
Once the headers are generated, they must be attached to your HTTP request. These headers will allow the server to verify the signature using the corresponding public key that you registered Layer1.
// Instantiate the http signer
HttpSigner signer = new HttpSigner(privateKey, clientId);

// Generate the signature headers
Map<String, String> headers = signer.buildHeaders(url, body, method);
Here,
privateKey: Your base64-encoded RSA private key.clientId: Key identifier registered with Layer1.buildHeaders: Returns a map of headers includingContent-Digest,Signature-Input, andSignature:Signature-Inputincludes metadata about the covered fields ("@method","@target-uri", etc.) and algorithm.Signaturecontains the cryptographic result of signing the base string.
Troubleshooting
If the signature fails Layer 1 validation, the primary issue may be with the payload and headers.
In this case, verify that you have done the following:
- Correctly acquired and specified your
clientID. - Uploaded your public key (not private one) to the account.
- Ensured there are no typos or other errors in the payload.
- Ensured the signed headers are added to the request.
- Ensured that your request was constructed according to our documentation.
Updated about 1 month ago