
Set Up Payment Processing
The following guide outlines the initial setup required to begin processing payments with the Merchant Payments Engine. These are one-time configurations needed during onboarding.
Set up webhooks
The Merchant Payments Engine communicates with your Digital Asset and Trading Engine through platform webhooks. They notify your system of events, such as payment status changes and account updates.
To add or update the webhooks, go to the Layer1 Portal Dashboard >Integrations > Hooks.
You only have to do this once.
You will need the following codes set up for webhooks.
| URL | Type | Event Codes |
|---|---|---|
| Speak to your Solutions representative | WEB | layer1:digital:deposit:status-change |
| Speak to your Solutions representative | WEB | layer1:digital:withdrawal:status-change |
| Speak to your Solutions representative | WEB | layer1:trade:conversion:state-changed |
| Speak to your Solutions representative | WEB | layer1:digital:deposit:status-change |
| Speak to your Solutions representative | WEB | layer1:trade:conversion:state-changed layer1:trade:conversion:created |
For more information, see Webhooks.
Link to the asset pool
Your Merchant Payments Engine requires a linked asset pool for transaction processing.
Contact your Solutions representative to complete this step. You only need to notify us of your preferred Asset Pool ID.
Set up fees
Before processing transactions, you must define at least the default fee policy.
To configure fees in the Layer1 Portal, see the Fee Policy Setup Guide.
Define processing settings
There are some settings you control which apply to all your merchant processing globally:
- Minimum and maximum payment values: These limits enforce validation within the Payment Links product, ensuring that all payments fall within a range appropriate for your business model.
- Micro payment threshold: Any digital asset amount received below this threshold—particularly for channel payments—will not be made available to your merchants. Instead, the assets will remain in your asset pool. These payments are typically too small to be operationally viable, for example, amounts that cannot be effectively converted at trading venues.
Contact your Solutions representative to complete this step.
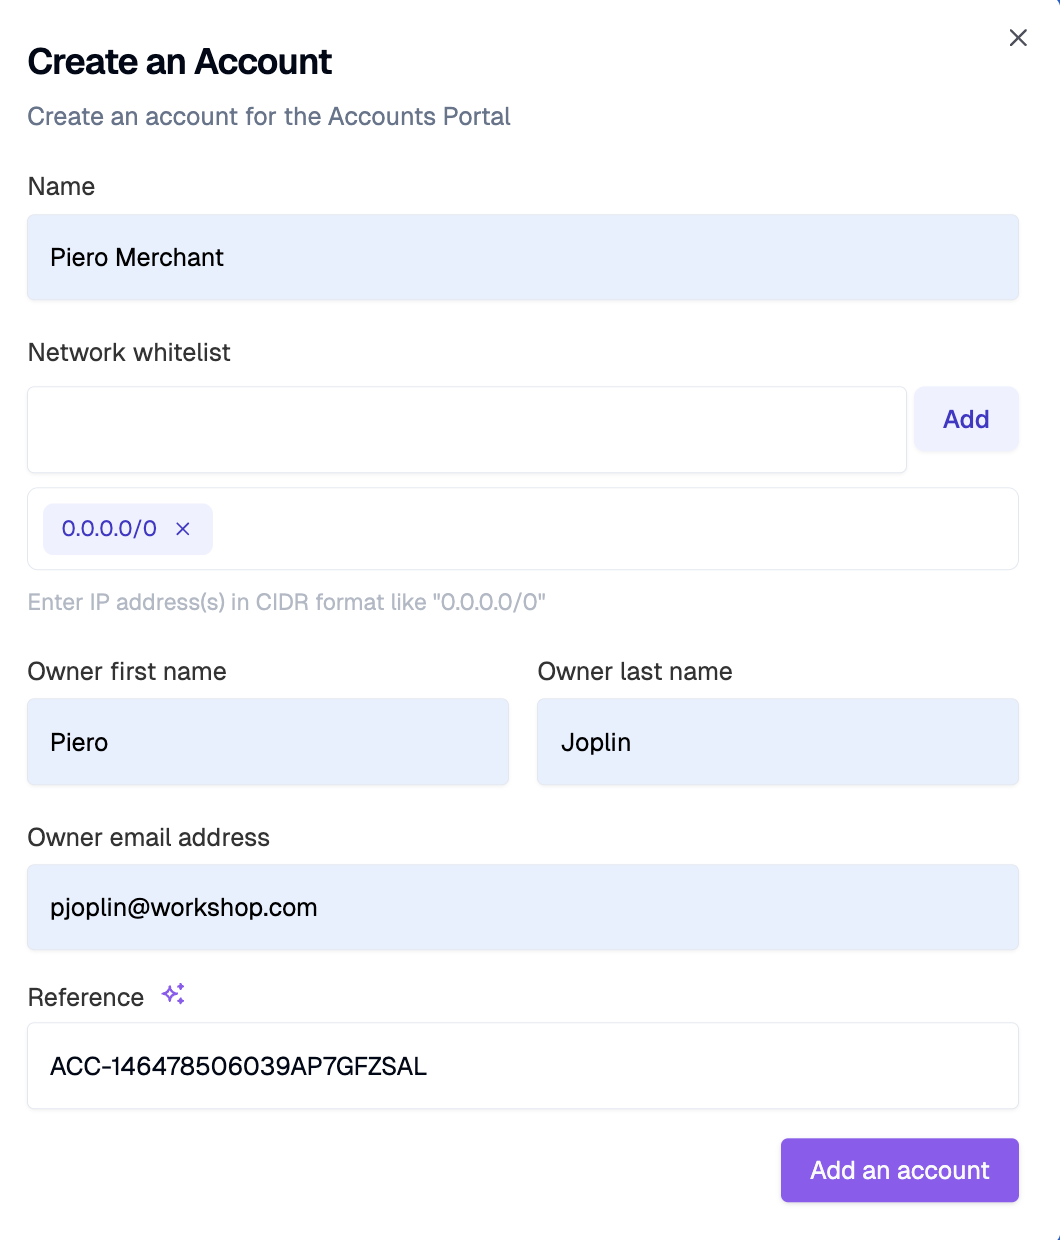
Create your Merchant Account
Finally, create an account for your merchant to provide them with payment capabilities.
To onboard your first merchant:
- Log in to the Layer1 Portal.
- Go to Merchant Payments > Accounts, and click +Account.
- On the Create an Account screen, provide the following details:
- Merchant name
- Owner details: first and last name, email address
- IP whitelisting configuration: allowed IP-addresses
- Click Add an Account.
After the submission, the owner receives an email invite. When they log in to the Merchant Portal, they can:
- Invite and manage team members and assign appropriate roles and permissions.
- Create and manage wallets.
- Configure API authentication (FAPI) to initiate payments via API.
Updated 2 months ago